a Tweet Tutorial...
I'm a blog a holic...especially when it comes to crafty blogs with lot's of eye candy or tutorials...however, I can't remember where I saw this cute little number so I freehanded and winged it (hahaha no pun intended!) and just sort of made up my own steps and didn't really measure anything but it's very simple and Noah and I had a blast making them...have at it!
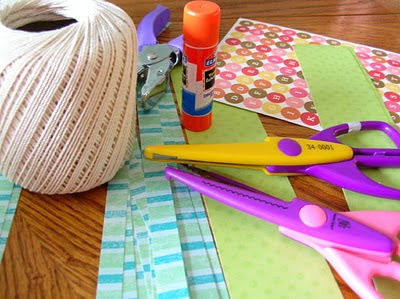
The supplies we used:
decorative edge cutting scissors, scrapbooking papers, glue stick, brads, bakers twine, paper punch, pencil, stickers and our crafty wits :)
I cut a 2" x 12" strip of paper for the base of the cage and fancy edged it...
put a dab of glue stick on one end and connected the two ends to make like a paper ring...
then I cut 3 strips of 12" by 1/4" (ish) strips...layed them all on top of each other, found center (ish) and used my paper punch to punch a hole through all 3 pieces...
inserted the brad through the hole through all three strips and fanned them out...
took another piece of 2" x 6" (ish) folded in half, opened it up, glue sticked the wrong sides together, freehanded a little birdie on it and cut it out...
so you end up with two birdies that are exactly the same , glued together so any way the birdie swings the pretty paper shows...
took the fanned out strips of the cage and put a dab of glue on each end and attached them to the inside of your paper ring aka. the birdcage base...I eyeballed them and just spaced them out...
then I punched a hole in the top of my birdie, attached a long piece of bakers twine string, carefully removed the brad from the top of the cage, ran the string up through the holes to where I wanted the birdie to hang inside the cage and replaced the brad and tightened it into place to keep the string where I wanted it and...
VIOLA! it's ready to hang...ENJOY!!! We made several of them and used some scrapbooking letter stickers to add the boys' names to the base of the cages :)
PS. if you are the creator of this fun little project or know the blog I might have gotten it from please let me know so I can pass the link on here because I'm sure her/your pics and directions are probably waaaaaay better than mine :) Thanks so much!!!


Comments
Beki
http://mymodernguide.blogspot.com/